How stand-off mounting works
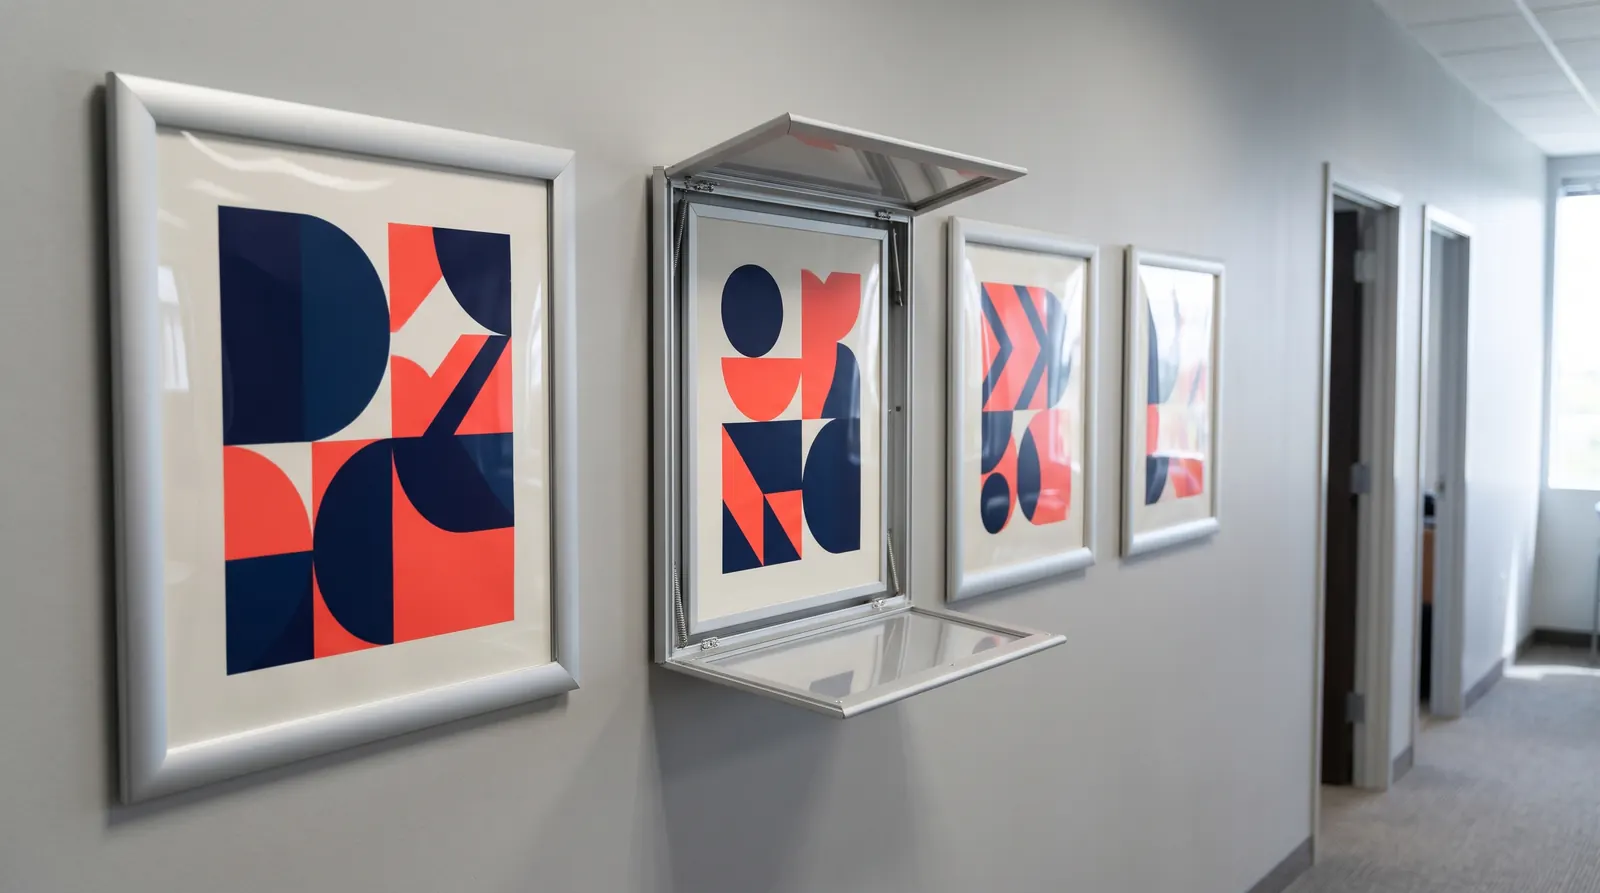
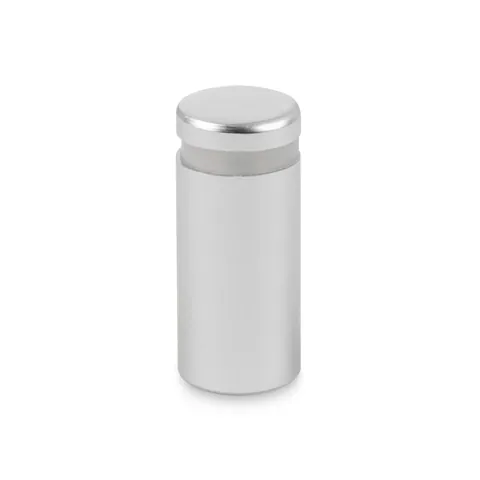
A stand-off is a small aluminium barrel that holds a sign roughly one to two and a half centimetres away from the wall. It usually has two parts: a barrel screwed to the wall and a cap that passes through the hole in the panel and screws into the barrel. The panel then floats in front of the wall without a frame, and the shadow behind it gives a light, modern look.
Stand-offs are used for panels made of acrylic, aluminium composite, glass and rigid PVC: a reception logo, information boards, consulting room signs and company name plates at the entrance. Fitting them means drilling the wall, so where drilling is not allowed or the sign should hang in front of glass, look at the cable systems described below.
Choosing stand-offs for your sign
The aluminium sign stand-off comes in eight sizes and three finishes: silver, matt silver and matt black. The size is given as two values in millimetres. The usual convention for stand-offs is diameter first and length second, but check this on the product page before ordering. Every variant has a 3 mm thick cap nut.
| Size (mm) | Thread diameter | Thread length |
|---|---|---|
| 13×13 | 8 mm | 10 mm |
| 13×19 | 8 mm | 14 mm |
| 15×20 | 8 mm | 14 mm |
| 15×25 | 10 mm | 20 mm |
| 19×19 | 10 mm | 14 mm |
| 19×25 | 10 mm | 20 mm |
| 25×19 | 10 mm | 15 mm |
| 25×25 | 10 mm | 20 mm |
Choose by the size of the sign and the effect you want. 13 mm stand-offs look discreet on small plates and door signs, while 19 and 25 mm are better proportioned for a large logo panel. A longer stand-off holds the panel further from the wall and deepens the shadow. Check the maximum panel thickness for each variant on the product page, or ask us before you order.
How many stand-offs you need
For a rectangular sign up to about A2 (420×594 mm), four stand-offs in the corners are usually enough. On longer panels, add further pairs along the long edge, in practice roughly every 50–80 cm, so the panel does not bow. Heavier signs in glass or thick material need closer spacing and stronger wall plugs.
Aluminium sign standoff
from €2.37 incl. VAT24 versions
In stock — ships in 1–2 business days
Cable display system "ceiling - floor"
€15.17 incl. VATIn stock — ships in 1–2 business days
Cable display system "wall - wall"
€22.21 incl. VATLead time on request
Cable display system "ceiling - sign"
€15.66 incl. VATIn stock — ships in 1–2 business days
Tools and materials
- Spirit level — standard or laser, to set out the line of the holes.
- Tape measure and pencil — for marking out; on dark walls, masking tape gives you a surface that is easier to mark.
- Drill — with hammer action for concrete and brick, without it for plasterboard and tiles.
- Drill bits — masonry bits matched to the wall plugs, plus metal or plastics bits if you drill the acrylic yourself.
- Wall plugs and screws — suited to the wall; check on the product page what comes with the stand-offs.
- Cable and pipe detector — so you do not hit wiring or a pipe.
- Screwdriver and soft cloth — to tighten the barrels and clean the panel at the end.
Fitting a sign on stand-offs, step by step
The steps below cover a sign with four stand-offs in the corners. With more stand-offs, the method is the same; you simply mark out more points.
- Prepare the panel and a template
If the panel is pre-drilled, measure the hole spacing precisely. If not, mark the holes symmetrically in the corners so that the whole cap sits on the panel with a few millimetres to spare; with 25 mm diameter stand-offs, that means at least about 20 mm from the edge. Transfer the hole positions to a sheet of paper at full size to use as a template on the wall.
- Drill the panel
Drill acrylic with a bit for plastics or metal, at low speed and without hammer action, with the sheet supported underneath by a piece of wood. Masking tape over the spot reduces chipping. Make the hole slightly larger than the cap thread (8 or 10 mm depending on the variant) so the panel is not under stress. Glass is best ordered pre-drilled from a glazier.
- Mark out the wall
Hold the template on the wall at the chosen height and level its top edge. Mark the hole centres through the paper, then measure the diagonals: if they are equal, the points form a true rectangle. Before drilling, check with a detector that there are no cables or pipes behind those spots.
- Drill the wall
Match the bit to the wall plug and the drill mode to the wall: hammer action for concrete and brick, no hammer for plasterboard and tiles. Keep the drill square to the wall. Drill slightly deeper than the plug length and clear the dust from the hole.
- Insert the wall plugs
Push the plugs in until their collars are flush with the wall surface. A plug standing proud of the wall pushes the barrel out and the panel will not sit flat. In plasterboard, use fixings designed for plasterboard.
- Screw on the barrels
Fix the barrels to the wall in the way the chosen stand-off is designed, until they no longer turn. Place a level or a straight edge across their faces to check they all sit in one plane. On a noticeably uneven wall the panel will be under stress, so even out such spots before fitting.
- Fit the panel and tighten the caps
Peel the protective film off the back of the panel and leave the front film on until the end. Offer the panel up to the barrels, start the caps by hand and tighten them evenly, working diagonally, until you feel resistance. Overtightening can crack acrylic or glass.
- Check and finish
Check the top edge of the sign with a level and make sure the panel does not move on the stand-offs. Finally, peel off the front film and wipe the surface with a soft cloth, water and a mild detergent. Do not use solvents or harsh chemicals on acrylic, as they can damage the surface.
Fixing into different walls
Concrete and brick
Drill with hammer action, using a bit that matches the wall plug, to a depth slightly greater than the plug length. Clear the dust from the hole before inserting the plug, otherwise it will not expand along its full length.
Plasterboard
Drill without hammer action and use cavity fixings designed for plasterboard, such as expanding or spring toggle fixings. Light acrylic signs can usually be fixed this way, but screw heavy glass panels into the studs, or ask a tradesperson to assess what the wall can carry.
Tiles and glass
On tiles, start drilling without hammer action using a tile bit, and switch the hammer on only once you are through the tile. Masking tape over the spot stops the bit from skating. Glass walls are not drilled, so choose a cable display system there.
Signs in front of glass or in open space: cable systems
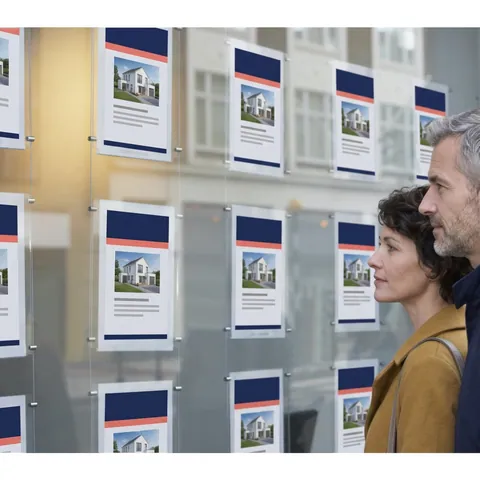
When a sign needs to hang in front of a shop window, a glass wall or in open space, use stand-off mounts and cable systems with a tensioned cable instead of stand-offs. You fix the cable at both ends, for example to the ceiling and the floor, and hang the signs on it at the height you want. Drilling is limited to the cable fixing points.
- Ceiling to floor — the ceiling-to-floor cable display system with a 400 cm cable, tensioned vertically, for example in front of a window.
- Wall to wall — the wall-to-wall cable display system with a 300 cm cable, run horizontally, for example in an alcove or above a counter.
- Wall to floor or ceiling — the wall-to-floor/ceiling cable display system with a 400 cm cable, when one end is fixed to a wall.
- Ceiling to sign — the ceiling-to-sign cable display system with a 400 cm cable, from which the sign hangs.
Panels are attached to the cable with single-sided or double-sided sign fixings. Check on the product page which version suits your layout before ordering.
Common stand-off mounting mistakes
- Holes too close to the edge — the panel cracks when tightened or at the first knock. The whole cap should sit on the panel with clearance to spare.
- Marking out without a template — a few millimetres of difference between the holes in the wall and the panel means the caps will not go in straight.
- Overtightened caps — acrylic and glass do not cope well with point pressure, so tighten by hand until you feel resistance.
- Wrong plug diameter — a loose plug spins in the hole, and one that is too tight splits or will not go in fully.
- Removing the protective film too early — a panel scratched during fitting looks worse than the old sign.
How to order stand-offs and cable systems
You will find stand-offs and cable systems in the stand-off mounts and cable systems category, and ready-made signs with replaceable inserts in the door signs category. Stand-offs are available from €2.37 incl. VAT. We ship stock items within 1–3 working days, with fast delivery across the EU and a VAT invoice.
Fitting signage across a whole building, or buying stand-offs in bulk for an agency or installation company? Send a quote request with the sizes and quantities. You can ask us about printing the panels in the same request, or have them printed by any print shop. We cover planning the whole system in office signage, and choosing door signs in how to choose a door sign.
Frequently asked questions
How many stand-offs do I need for one sign?
For a rectangular sign up to about A2, four stand-offs in the corners are usually enough. On longer panels, add further pairs along the long edge, in practice roughly every 50–80 cm, so the panel does not bow or lift away from the wall. Heavy signs in glass or thick material need closer spacing and wall plugs suited to their weight.
Which stand-off size should I choose?
The aluminium stand-off comes in sizes from 13×13 to 25×25 mm. Smaller ones look discreet on door signs and small plates, while larger ones suit the proportions of a big logo panel. A longer stand-off holds the panel further from the wall and deepens the shadow. Check the thread diameter (8 or 10 mm) and the maximum panel thickness on the page of the chosen variant.
Can I fit a sign on stand-offs to plasterboard?
Yes, provided you use cavity fixings designed for plasterboard, such as expanding or spring toggle fixings, and drill without hammer action. Light acrylic or aluminium composite signs can usually be fixed this way. Heavy glass panels are better screwed into the studs, or assessed by a tradesperson who can judge what the wall will carry.
How do I drill acrylic without cracking it?
Use a bit for plastics or metal, set a low speed and switch off hammer action. Support the sheet from underneath with a piece of wood and put masking tape over the spot. Do not press hard, and slow down as the bit breaks through. Make the hole slightly larger than the cap thread and keep a sensible distance from the edge of the sheet.
What is the difference between a cable system and stand-offs?
Stand-offs fix the panel directly to the wall, holding it roughly one to two and a half centimetres away. A cable display system is a tensioned cable, for example between ceiling and floor or between two walls, on which you hang signs at any height. It works in front of shop windows, glass walls and in open spaces, where there is no wall to screw the panel to.